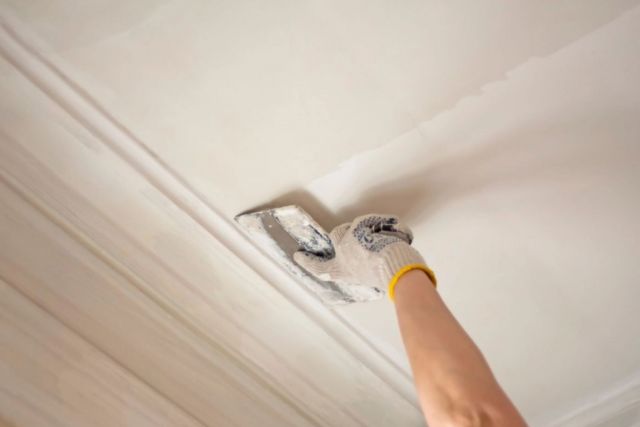
Lime plastering is a traditional technique that not only enhances the aesthetic appeal of a ceiling but also provides numerous practical benefits. This guide examines the characteristics of lime plaster and outlines why it is an excellent choice for ceilings, emphasizing its breathability, durability, and visual attractiveness. The content includes a comprehensive overview of the essential tools and materials required, preparation steps, and the application process. Furthermore, it identifies common pitfalls to avoid and offers recommendations for effective maintenance. Is your ceiling ready for transformation?
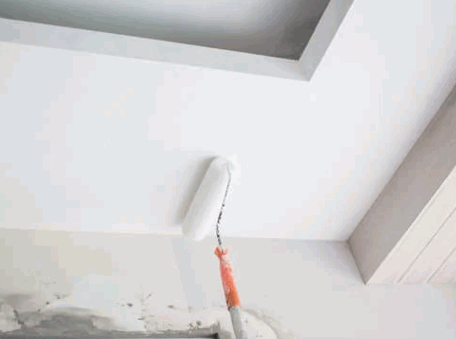
What Is Lime Plaster?
Lime plaster is a traditional plastering material that has been used for centuries as an internal wall finish in various types of buildings, including both historic structures and modern homes. It is an essential component in restoration work and heritage conservation efforts.
Composed of lime, water, and aggregates such as sand, lime plaster provides a breathable medium that facilitates moisture escape while ensuring excellent air quality. It's considered an eco-friendly option for various applications.
It can be formulated using either hydraulic lime or non-hydraulic lime, which allows for its versatility in different applications, whether for decorative purposes or structural repairs. Additionally, plaster of Paris can be added to the mix to enhance its properties.
Additionally, its adaptability extends to the inclusion of plaster of Paris in certain formulations, thereby enhancing its functionality in plastering projects.
Take a look: Can You Skim Coat With Lime Plaster
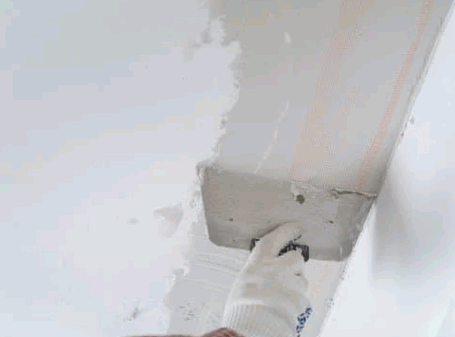
What Are The Benefits Of Using Lime Plaster On Ceilings?
The application of lime plaster on ceilings presents numerous advantages, making it an optimal choice for homeowners and builders seeking an eco-friendly solution that enhances both aesthetics and functionality.
Lime plaster acts as a natural dehumidifier, aiding in the regulation of humidity levels and mitigating moisture-related issues that frequently affect traditional gypsum or cement plaster alternatives.
Furthermore, its durability and long-lasting material properties ensure that lime plaster ceilings endure over time while providing a soft, natural finish that adds character to any room. These properties make it suitable for both new construction projects and the preservation of historical buildings.
Breathability
One of the notable characteristics of lime plaster is its breathability, which facilitates the escape of moisture from walls and ceilings, thereby preventing the accumulation of dampness commonly associated with traditional plastering materials. This property is particularly beneficial in historic buildings where maintaining structural integrity is crucial.
This natural property not only enhances the structural durability but also contributes to improved air quality within the home. Due to its hygroscopic nature, lime plaster effectively absorbs excess moisture from the air and subsequently releases it when conditions become drier. This dynamic equilibrium is vital for regulating humidity levels, thereby fostering a healthier living environment for occupants.
The implications of incorporating breathable materials such as lime plaster in construction are substantial. By minimising moisture-related issues such as mould and mildew, homeowners can experience a more comfortable living space, potentially mitigating health risks linked to poor air quality. Lime plaster's breathability properties make it an ideal choice for managing humidity levels.
Key benefits include:
- Improved indoor air quality
- Natural dehumidification
- Reduced risk of mould growth
As awareness of sustainable building practices continues to grow, the adoption of lime plaster is increasingly gaining traction, positioning it as an optimal choice for contemporary homes. This trend is evident in various homebuilding and renovation topics discussed by experts in the field.
Durability
Lime plaster is widely recognised for its exceptional durability, offering significant resistance to cracking and damage over time. This characteristic makes it a preferred material for both new construction projects and structural repairs in historic buildings. Its application in construction methods has proven effective for centuries.
The unique composition of lime plaster, which combines calcium carbonate with water and aggregates, provides remarkable strength and flexibility that surpass traditional gypsum and cement alternatives. Unlike gypsum plaster, which tends to absorb moisture and suffer from crumbling, lime plaster allows buildings to "breathe," effectively managing humidity levels. Its inherent resilience allows it to expand and contract in response to temperature fluctuations, thereby minimising the risk of damage and subsequent deterioration.
- Long-lasting finish suitable for a variety of applications
- Enhances the aesthetic appeal of interior spaces
- Supports effective maintenance strategies in historic restorations
In conclusion, selecting lime plaster not only enhances the aesthetic and structural qualities of new constructions but also preserves the authenticity and integrity of historic architecture during restoration efforts.
Aesthetics
The aesthetic appeal of lime plaster is attributed to its capacity to create a soft, natural finish that enhances the visual character of any room. This material allows for a diverse range of decorative possibilities, from subtle textures to vibrant colours.
Lime plaster serves as an exceptional foundation for various decorative techniques that can significantly elevate the overall ambience of a space. By incorporating additional elements, such as vibrant paints, Venetian plaster, or tadelakt plaster, one can achieve a luxurious surface that captures attention.
- Venetian Plaster: Recognised for its polished, marble-like finish, this technique takes full advantage of lime plaster's inherent properties. It is a popular choice in modern plaster mixes for its aesthetic appeal.
- Tadelakt Plaster: This traditional Moroccan finish introduces a unique, water-resistant quality, adding both texture and depth to interior spaces.
The application of lime plaster on ceilings dramatically transforms interior aesthetics, providing a versatile foundation that complements a wide range of styles, including rustic, Mediterranean, modern, and minimalist. Its adaptability enables homeowners to express their personal tastes creatively, while ensuring that the final result is both visually striking and durable.
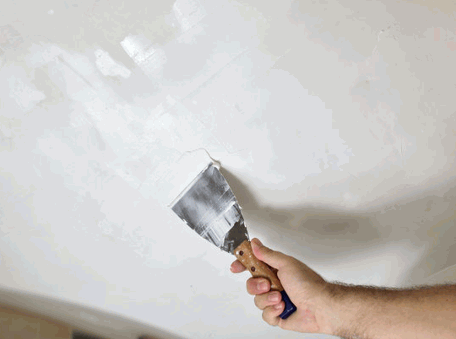
What Tools And Materials Do You Need For Lime Plastering A Ceiling?
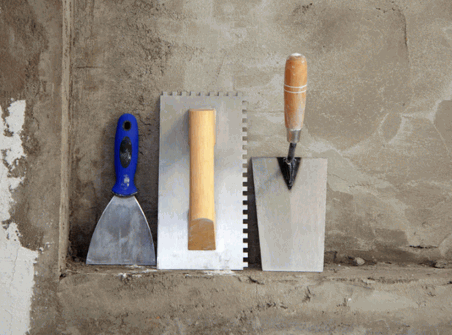
To successfully apply lime plaster to a ceiling, it is essential to have a range of tools and materials at your disposal. This includes the lime plaster itself, which can be prepared using a three-coat system designed to provide a durable finish and optimal adhesion to the ceiling surface. Additionally, ensuring the right plaster types such as Venetian plaster or tadelakt plaster are crucial for achieving the desired aesthetic and functional outcomes.
To successfully apply lime plaster to a ceiling, it is essential to have a range of tools and materials at your disposal. This includes the lime plaster itself, which can be prepared using a three-coat system designed to provide a durable finish and optimal adhesion to the ceiling surface.
How To Prepare The Ceiling For Lime Plastering?
Preparing a ceiling for lime plastering requires meticulous cleaning and repair of the existing surface to ensure proper adhesion and achieve a flawless finish. This step is crucial for obtaining optimal results in the plastering process.
Cleaning And Repairing The Ceiling
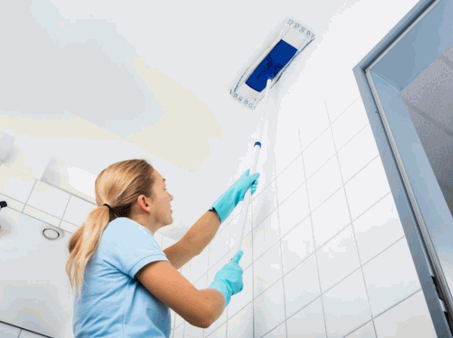
The initial step in preparing a ceiling for lime plastering involves a comprehensive cleaning of the surface to eliminate any dust, dirt, or remnants of old paint that may hinder the adhesion of the new plaster and compromise the smoothness of the finish.
To accomplish this, various cleaning methods should be applied according to the type of ceiling. For example, masonry ceilings may benefit from the use of a pressure washer to effectively remove entrenched dirt, while a damp sponge may suffice for plaster or plasterboard surfaces. This process is often referred to as masonry cleaning.
It is also essential to evaluate the presence of any cracks or damage on the surface. Should any be identified, appropriate methods such as plaster repairs, filling, and patching must be undertaken prior to the application of the plaster. This will ensure optimal adhesion and a refined appearance following the plastering process.
Furthermore, it is important to allow sufficient drying time for any repairs before proceeding with the cleaning and plastering tasks.
Applying A Bonding Agent
Following the cleaning and repair of the ceiling, the application of a bonding agent is essential to promote adhesion between the lime plaster and the surface, thereby ensuring the longevity of the plastering work and preventing issues such as peeling or cracking. Incorporating animal hair and fine aggregate can further enhance the bonding properties for a more robust finish.
Following the cleaning and repair of the ceiling, the application of a bonding agent is essential to promote adhesion between the lime plaster and the surface, thereby ensuring the longevity of the plastering work and preventing issues such as peeling or cracking. Incorporating animal hair and fine aggregate can further enhance the bonding properties for a more robust finish.
Following the cleaning and repair of the ceiling, the application of a bonding agent is essential to promote adhesion between the lime plaster and the surface, thereby ensuring the longevity of the plastering work and preventing issues such as peeling or cracking.
There are several types of bonding agents available, each designed to address specific surfaces and environmental conditions. For example, polymer emulsions are frequently preferred due to their ability to enhance flexibility and improve adhesion across various substrates. Furthermore, acrylic additives may be incorporated with the lime plaster to achieve a more resilient finish.
To effectively apply these bonding agents, the following guidelines should be followed:
- Ensure that the surface is thoroughly cleaned and free of dust.
- Mix the bonding agent with water in accordance with the manufacturer’s instructions.
- Apply an even coat of the bonding agent using a brush or roller to ensure uniform coverage.
- Allow for adequate drying time before proceeding with the application of the lime plaster for optimal bonding.
The use of the appropriate bonding agent significantly enhances the performance and durability of the plaster, thereby minimising the risk of future defects.
How To Apply Lime Plaster On A Ceiling?
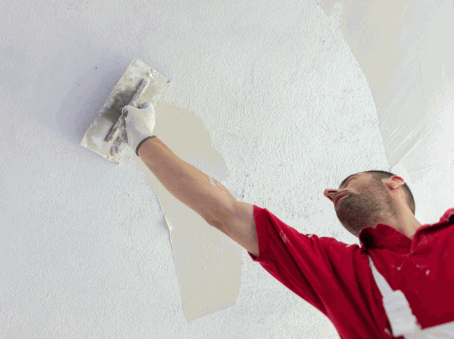
The application of lime plaster on a ceiling involves a systematic process that includes the proper mixing of the plaster, the application of multiple coats, and the meticulous finishing of the surface. It's essential to follow traditional techniques to ensure a high-quality finish.
The application of lime plaster on a ceiling involves a systematic process that includes the proper mixing of the plaster, the application of multiple coats, and the meticulous finishing of the surface.
This method ensures a high-quality result that effectively highlights the distinctive characteristics of lime plaster, showcasing lime plaster benefits in various applications.
Mixing The Plaster
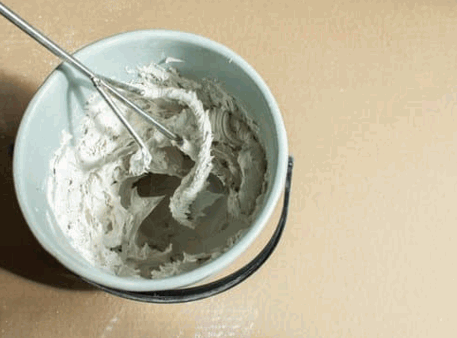
Mixing lime plaster necessitates a careful balance of hydraulic or non-hydraulic lime in conjunction with aggregates and water to achieve the appropriate consistency, which is crucial for effective plastering of walls and ceilings.
To produce a high-quality plaster mix, it is essential to understand the precise mixing ratios. A generally recommended starting point is a ratio of 1 part lime to 3 parts aggregates; however, this may vary according to specific project requirements.
The aggregates, both fine and coarse, significantly influence the overall strength, texture, and workability of the plaster. Fine aggregates, such as sand, contribute to a smooth finish, while coarse aggregates enhance bulk and durability.
- Hydraulic lime mixes typically necessitate a higher proportion of aggregates compared to non-hydraulic types, which can subsequently affect the drying time.
- The consistency of the mix is critical; a mixture that is too dry may result in cracking, whereas one that is excessively wet may impair adhesion.
Ultimately, achieving the correct blend not only improves aesthetics but also enhances the longevity of the application process, ensuring a flawless and durable plaster surface.
Applying The First Coat
The initial application of lime plaster is conducted using a trowel, establishing a base layer that functions as an anchor for subsequent coats in the traditional type of a three-coat system. This step is fundamental in creating a solid foundation for a successful plastering project.
The application of the first coat necessitates the implementation of several essential techniques to achieve optimal results. The thickness of this layer is critical, typically ranging from 10 to 15 mm. It is imperative to apply this coat evenly to mitigate the risk of future cracking or the formation of uneven surfaces.
Timing is also a crucial factor; allowing the first coat to dry adequately before proceeding with the next application is essential, generally requiring 24 to 48 hours, contingent upon environmental conditions. To ensure a uniform surface, a float should be employed to smooth out any imperfections.
- It is important to monitor the moisture content and drying time closely.
- Consistent pressure should be utilised while trowelling to achieve an even finish.
The integrity of the overall plastering system significantly depends on the proper execution of these initial steps.

Applying The Second Coat
The second coat of lime plaster builds upon the first, enhancing the overall surface finish and ensuring a durable, long-lasting application that leverages the unique properties of lime plaster.
After allowing the initial coat to cure for the recommended duration, typically between 24 to 48 hours, it is essential to inspect the surface for any imperfections that may require special attention. The application of the second coat is often regarded as the most rewarding stage of the plastering process, as it not only enhances aesthetic appeal but also fortifies the wall. To commence this phase, a damp sponge can be utilised to prepare the first coat, ensuring that it is sufficiently moist to bond effectively with the new layer, which is crucial for addressing any damp issues.
Many professionals advocate the use of a hawk and trowel to achieve even distribution, which allows the plasterer to apply the second coat uniformly. This technique involves gently pressing the plaster onto the wall while moving in a circular or sweeping motion to create a seamless transition, reminiscent of historical plasterwork techniques.
The following steps are recommended for optimal application:
- Allow the first coat to slightly harden.
- Moisten the surface with a spray of water.
- Apply the second coat in thin layers, ideally no thicker than a quarter of an inch, to prevent cracking.
Meticulous attention to timing and application techniques will ultimately result in an optimal finish that highlights the natural beauty of the lime plaster.
Finishing The Surface
Finishing the surface of a lime-plastered ceiling involves employing techniques that achieve the desired texture and appearance, thereby facilitating creative expression and emphasising the decorative qualities of lime plaster, such as those seen in the Venetian plaster style.
A variety of finishing techniques can be utilised to enhance the aesthetic appeal of a ceiling constructed from this versatile material. Techniques such as smoothing yield a sleek, polished finish, which is particularly suitable for those who favour a minimalist design approach.
Conversely, texturing provides a more tactile surface, introducing depth and character that can effectively complement various interior styles. Furthermore, painting over lime plaster enables homeowners to personalise their spaces by selecting colours that harmonise with their existing décor. When these techniques are adeptly combined, they generate a striking visual impact that transforms a plain ceiling into a captivating focal point.
- Smoothing: Ideal for modern interiors.
- Texturing: Adds personality and warmth.
- Painting: Customises the overall ambience.

What Are The Common Mistakes To Avoid When Lime Plastering A Ceiling?
When applying lime plaster to a ceiling, avoiding common mistakes is crucial for enhancing the quality of the final outcome. This attention to detail ensures that the plaster adheres effectively and retains its intended properties over time, a principle highly valued by experts like Sean Wheatley and institutions such as Historic Scotland.
Using The Wrong Type Of Lime
One of the most critical errors to avoid when lime plastering is the selection of an inappropriate type of lime, as hydraulic lime and non-hydraulic lime possess distinctly different characteristics that significantly impact the success of the plastering project. Understanding these differences is essential for achieving optimal outcomes in construction and renovation initiatives.
Hydraulic lime, which sets through a chemical reaction with water, is particularly suitable for applications in areas exposed to moisture, addressing common moisture problems. In contrast, non-hydraulic lime relies on carbonation and is better suited for dry environments. This distinction profoundly influences the material's adhesion, durability, and finish, key considerations in the plastering job.
- Adhesion: Hydraulic lime generally offers stronger adhesion to various substrates, making it ideal for external applications.
- Durability: Non-hydraulic lime provides flexibility and breathability, which are advantageous for the preservation of historic buildings.
- Finish: The appearance of the plaster can vary based on the type of lime selected; hydraulic lime typically results in a smoother finish, whereas non-hydraulic lime yields a more textured look.
Consequently, selecting the appropriate type of lime is paramount for achieving the desired results in any plastering endeavour.
Not Preparing The Ceiling Properly
Failing to prepare the ceiling adequately can result in adhesion problems and an unsatisfactory finish. Therefore, thorough cleaning and the application of a bonding agent are essential steps in the lime plastering process.
Ahead of commencing any plastering project, it is imperative to ensure that the surface is as clean as possible. The presence of dust, grease, and previous coatings can impede the lime plaster's ability to adhere effectively.
Cleaning the surface may involve sweeping, vacuuming, or washing with a mild detergent to eliminate any contaminants. Once the surface is cleaned, it is important to inspect the ceiling for any cracks or damage that may require repair, a task often addressed by a skilled homebuilding team.
Addressing these imperfections is crucial, as neglecting to do so can compromise the integrity of the finished plaster. Appropriate fillers or sealants should be used to address any gaps and create a uniform surface.
Subsequently, applying a bonding agent to the surface enhances adherence, which is especially important for challenging substrates. It is essential that the chosen bonding agent is compatible with lime plaster to ensure optimal results.
Meticulously following these steps is of utmost importance, as they significantly influence the final quality of the plaster and ultimately determine the success or failure of the project.
Applying Too Thick Of A Coat
Applying an excessively thick coat during the lime plastering process can lead to cracking or improper drying, thereby compromising the integrity of the plaster and its performance over time. In the realm of traditional building techniques, achieving a high-quality finish is essential, and the thickness of each application significantly impacts both aesthetics and functionality. Thin, even coats facilitate adequate drying, reducing the likelihood of defects and ensuring a durable result. A meticulously controlled approach enhances the longevity of the finish and promotes improved adhesion between layers.
To achieve optimal results, consider the following guidelines for determining the appropriate thickness for each coat:
- Utilise a straightedge or trowel to assess the flatness of the applied layer, targeting a thickness of 5-10 mm for each coat.
- Perform a touch test; the surface should feel firm yet slightly cool, indicating sufficient moisture content.
- Monitor the drying time closely; thinner coats typically dry within a shorter timeframe, which aids in scheduling subsequent applications.
By adhering to these best practices, the final outcome will exemplify superior craftsmanship that not only appears aesthetically pleasing but also endures over time, reflecting the decorative aspects of plaster types like Venetian plaster.
How To Maintain Lime Plaster Ceilings?
Maintaining lime plaster ceilings, whether they are from the Georgian period or an Edwardian cottage, is crucial for preserving their aesthetic appeal and functionality over time. This involves regular cleaning, prompt repairs, and periodic reapplication of a protective coat to ensure its enduring beauty.
Regular Cleaning And Dusting
Regular cleaning and dusting of lime plaster ceilings are essential for preventing dirt accumulation and maintaining the plaster's natural appearance, thereby preserving its beauty and functionality, much like the soft natural finish found in historic Scotland houses.
Routine maintenance not only enhances the aesthetic appeal but also supports the integrity of the material over time. To achieve optimal results, it is imperative to use appropriate tools and products that are both gentle and effective, such as those provided by Earthborn Paints.
Soft brushes and microfibre cloths are highly recommended for this maintenance process, as they can effectively remove dust without scratching or damaging the plaster surface. The following methods and products should be considered when addressing cleaning tasks:
- Utilise a soft-bristle brush to gently sweep away dirt and cobwebs.
- Prepare a solution of water mixed with a mild, pH-balanced cleaner for wiping down the surface, ensuring compatibility with lime plaster.
- Conduct regular inspections for any signs of wear or damage to address issues in a timely manner.
By adopting these effective cleaning techniques, the longevity and allure of lime plaster surfaces can be preserved, allowing their distinctive beauty to be showcased for years to come.
Repairing Any Cracks Or Damage
Promptly repairing any cracks or damage in lime plaster ceilings is essential for maintaining the integrity of the plaster and preventing further deterioration that could result in more significant issues.
Recognising signs of wear early can save both time and resources in the long run. Cracks may develop due to various factors, including structural shifts, fluctuations in humidity, or the aging of materials in older properties, such as those from the Tudor period or a Victorian terrace.
To effectively address these concerns, individuals should gather the appropriate materials, which include:
- Lime putty
- Fine, dry sand
- A trowel and a hawk
- A brush for cleaning the crack
Once the necessary supplies are assembled, the repair process should begin with a thorough cleaning of the crack to remove dust and debris. After preparing the area, a mixture of lime putty and sand can be applied to fill the crack smoothly. It is crucial to allow the repair to set properly to reinforce the structure and longevity of the plaster.
Addressing these issues promptly not only enhances the aesthetics of the space but also strengthens the overall integrity of the building.
Reapplying A Protective Coat Every Few Years
Reapplying a protective coat to lime plaster ceilings every few years is essential for maintaining their durability and appearance. This practice extends the longevity of the plaster while enhancing its breathability and aesthetic qualities. Such periodic care is vital for preserving the unique texture and finish characteristic of lime plaster, as well as ensuring that the material continues to perform effectively under various environmental conditions.
Utilising products specifically formulated for lime plaster is critical in this maintenance process. Several options are available:
- Natural oils – These nourish the plaster while allowing it to breathe.
- Wax finishes – These provide a protective layer that prevents moisture ingress and enhances the surface sheen.
- Silicate-based paints – Ideal for those seeking a more robust protective solution, these options ensure that the semi-permeable qualities of the plaster remain intact.
It is generally advisable to reapply these protective coatings, such as lime wash or breathable paint, every three to five years, depending on environmental factors and the level of use in the space.
Regular maintenance not only safeguards the visual appeal of the plaster but also supports its functional capabilities, making it an integral aspect of a comprehensive maintenance strategy.


